How to change a baby’s diaper?

Changing a baby’s diaper might not seem like the highlight of your day, but it’s your golden key to a happier and healthier baby. Though the fundamental purpose of changing diapers is to maintain good hygiene, changing diapers timely helps prevent skin issues, diaper rash, infection, and contributes to better sleep quality. Plus, the colour and consistency of stool and urine helps parents or caregivers to monitor the baby’s health. That’s why changing a baby’s diapers is very essential for a baby’s well-being.
This blog covers step-by-step guidance for changing your baby’s diaper and helpful tips for easy parenting.
Gather your supplies: Diapering essentials
Here’s a guide on the must-have items for a well-prepared diaper-changing station:
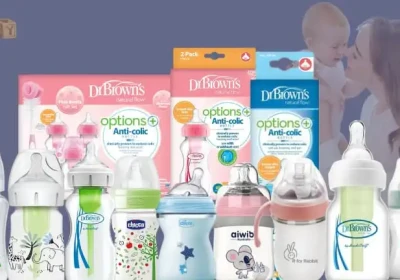
Diapers: Choose the right diaper size according to your baby’s weight and age. It’s better to have extra diapers.
Baby Wipes: Since a baby’s skin is sensitive, opt for fragrance-free and hypoallergenic baby wipes to avoid skin irritation. You can also use cotton balls and warm water to clean your baby.
Changing Mat or Pad: You need a waterproof changing mat or pad to create a clean, comfortable surface for diaper changes. You need portable changing pads that are handy for on-the-go diaper changes.
Diaper Rash Cream: You might need a diaper rash cream containing zinc oxide or another recommended ingredient. You can apply a thin layer during diaper changes to prevent or soothe diaper rash.
Disposable Diaper Bags: You should always keep disposable diaper bags for hygienic disposal of soiled diapers.
Extra Set of Clothes: You should ensure a spare set of baby clothes in case of leakage or any unexpected messes during diaper changes.
Hand Sanitizer or Baby-Friendly Wipes: Always remember to clean your hands before and after diaper changes to prevent the spread of germs.
Distraction Toys or Items: You can keep small toys or items that can distract and entertain your baby during diaper changes.
Remember to regularly check your diaper-changing supplies to avoid running out during crucial moments. A well-organised and stocked changing station makes the process more efficient and enjoyable for you and your baby.
When to Change the diaper?
The sniff Test: When it comes to detecting if it’s time for a diaper change, your nose knows best! Different smells can tell you if your baby needs a new diaper
The Colour Spectrum: Ever noticed that your baby’s diaper comes in various colours? Each colour can tell you if it’s time for a change. If it’s dark yellow or green, then consider changing the diaper.
The Touch Test: Sometimes, you must get hands-on to figure things out. Feeling the diaper can tell you if it’s wet or dry.
If you still can’t figure out when to change. you can always peek inside and decide whether to change it or not. Besides these techniques, your baby might also give you a hint if they are not happy with the diaper situation.
How to change a baby’s diaper
Before beginning this process, clean your hands to prevent spreading of germs.
Step 1: Gather Your Supplies
Before you begin, gather all the necessary supplies like clean diapers, baby wipes, diaper rash cream (if needed), a changing mat or pad, and a spare set of clothes and toys for distraction.
Step 2: Place your baby on a changing mat or clean surface
First, lay your baby on a changing mat. If you do not have a changing mat, spread a cloth on a clean surface area and lay your baby flat. Always keep one hand on your baby and grab the supplies with the other hand.
Step 3: Remove the dirty diaper and dispose of it
Gently undo the diaper tabs on both sides, slowly lift your baby’s leg and carefully fold the dirty diaper underneath your baby. You can also use the front part of that diaper to remove excess poop if needed.
To dispose of the diaper, wrap it into a ball and place it into a diaper disposable bag. Dispose of the diaper in a diaper pail or trash can. Never flush it down the toilet.
Step 4: Clean your baby
You can gently use baby wipes or warm water and cotton balls to clean your baby. Girls must be wiped from front to back to reduce the risk of Urinary Tract Infection(UTI). You must be gentle throughout this process.
Step 5: Apply diaper cream(if needed)
If you notice some redness or some signs of diaper rash, apply the diaper cream recommended by paediatricians that is safe for your baby.
Step 6: Put on a clean diaper
Before putting on a clean diaper, make sure your baby is dry. Then, slide a clean diaper under your baby, ensuring the back of the diaper is aligned with their waist. Bring the front of the diaper up between your baby’s legs and fasten the tabs.
Step 7: Dress your baby
If necessary, dress your baby in a clean outfit. Make sure to check for any leaks or spills before you finish dressing them.
Step 8: Wash your hands
After changing the diaper, wash your hands thoroughly with soap and water to prevent the spread of germs.
Benefits of changing diaper in time
Preventing Diaper Rash:
Regular diaper changes help prevent diaper rash. Maintaining clean and dry skin reduces the skin irritation, redness, and discomfort for the baby.
Promoting Hygiene:
Dirty diapers can lead to bacterial growth and unpleasant odours. Changing diapers promptly maintains a clean and sanitary environment for the baby and also reduces the risk of infections.
Comfort and Happiness:
Babies are more comfortable when they have a dry and clean diaper. Your baby might be fussy and irritated due to the discomfort caused by wet or soiled diapers. A comfortable baby is more likely to sleep well and play happily.
Preventing Leaks:
Wearing a wet diaper for an extended period can lead to leaks, which not only create a mess but also cause discomfort for the baby.
Monitoring Baby’s Health:
Diaper changes allow parents/caregivers to monitor the baby’s health. Changes in urine and stool patterns can indicate potential health issues.
Continuous application of baby powder can negatively affect infants. Ingesting or inhaling it can lead to irritation and inflammation of the respiratory system.
As for baby lotions, oils, and creams, you don’t really need them for regular diaper changes—unless your baby has a rash. You can use a diaper cream with each change, like plain petroleum jelly or zinc oxide. Just make sure to let your baby’s bottom dry for a bit before applying the cream and putting on a new diaper.

No Comments